
Pre-wiring checklist
Before the plaster goes on
A pre-wiring checklist for smart homes in Bengaluru — for homeowners and architects planning a new build or a full renovation.
A smart home is decided long before it's switched on. Once the walls are plastered and the false ceiling is closed, every missing wire means breaking something.
We've done this in 200+ homes since 2019, and the costly mistakes nearly always happen at the same stage: after the conduits are chased, before anyone has decided what goes in them. This is the list we walk through with homeowners and architects before plastering. Print it and take it to site.
You won't need every item. But each one has to be decided, yes or no, before the plaster goes on.
Once the walls are plastered and the false ceiling is closed, every missing wire means breaking something.
- Decide
- Before plaster
- Back-boxes
- Standard
- Track record
- 200+ homes since 2019
Each item decided, yes or no, before the plaster goes on.
- Checklist
- Printable PDF
- For
- Homeowners and architects
- Stage
- New build or renovation
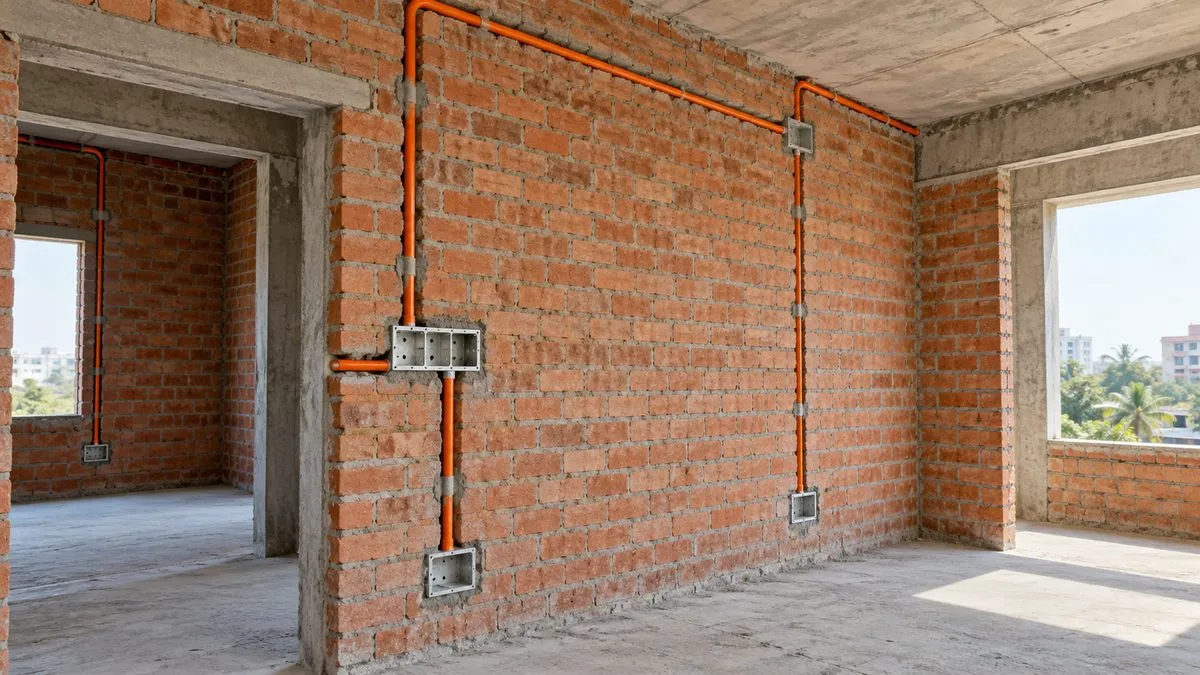
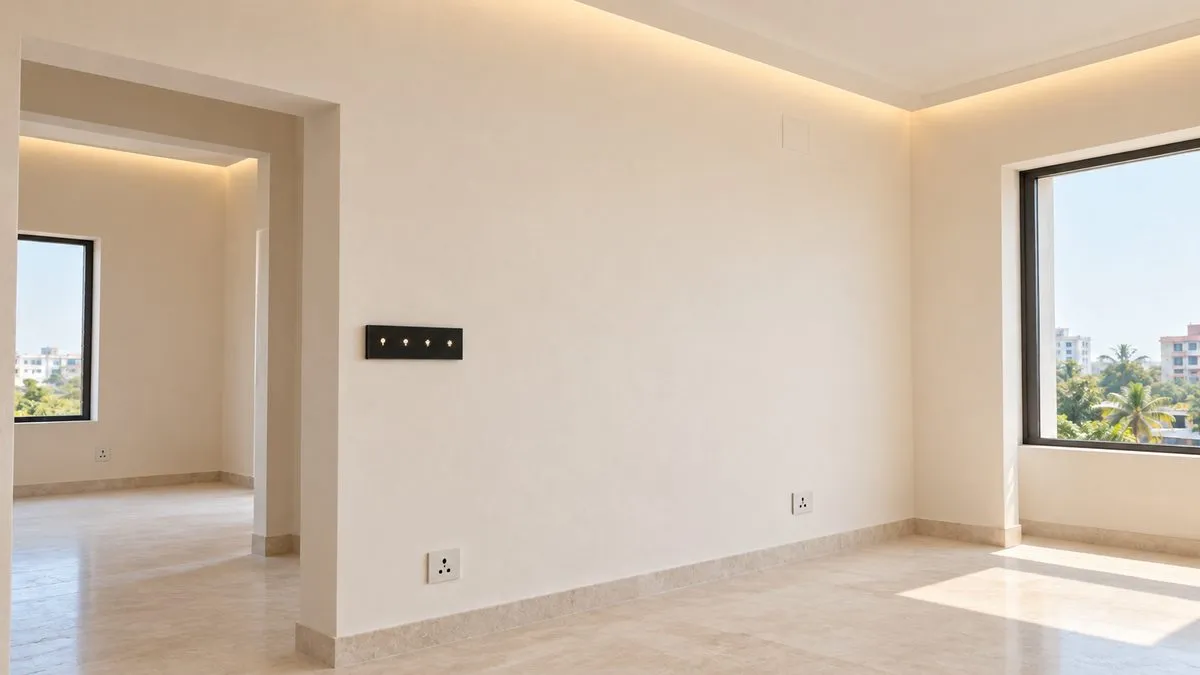
1. Conduits and back-boxes for smart switches
We do not use special back-boxes or special conduit. Stoic and the other smart switches we fit go into a normal standard gang box, fed through normal standard conduit. What matters before plastering is where the boxes go and what is wired to them.
- Mark every switch point on the electrical drawing, and decide which ones will be smart switches, touch panels or scene keypads.
- Use normal standard gang boxes at every switch point. Stoic, our own in-house touch-switch brand, and the other smart switches we fit need no special or deeper box.
- Use normal standard conduit for switch drops. No special conduit is needed. Do not pack it full, so more wire can be pulled later.
- Leave a draw wire in every conduit that is empty today, so cable can be pulled through later without breaking the wall.
- Keep switch heights consistent through the house: standard height, or as suggested by your architect.
- Plan scene keypad positions now: the main entrance, bedsides, and the home theater door are the usual places.
- Run data, speaker and camera cables in their own conduit, separate from mains power cables.
2. A neutral wire at every switch point
Many older wiring layouts bring only the switched phase down to the switch. Most smart switches need a neutral at the box to power themselves. Without one, your product choices shrink.
- Ask your electrician to run a neutral to every switch box, including two-way and staircase switch points.
- Check it on site before plastering: ask to see the neutral at each box, and tick it off room by room.
- Stoic switches need a neutral at every switch box. If you plan to use Stoic, a neutral at each box is required, not optional.
- Label every circuit clearly at the distribution board, so programming and later service are straightforward.
3. Cat6 runs
Wi-Fi is only as good as the cabling behind the access points. Wherever a device should be wired, run Cat6 now. It is cheap in the wall and expensive to add later.
- Wi-Fi access points: a ceiling Cat6 point for each access point. How many you need depends on the layout. We plan it from your floor plan.
- TV walls: one Cat6 run to every TV point.
- Home theater: Cat6 to the equipment position and to the projector position.
- CCTV: Cat6 to every camera point. PoE cameras take power and data over the same cable.
- Bring every Cat6 run back to the central rack in one piece. No joints in the middle.
- Leave spare cable at each end of every run, so the point can be terminated or moved slightly without a new pull.
- Label both ends of every cable with the same room and point name.
4. Speakers: multi-room audio and home theater
Speakers are wired, even when the music comes from an app. Every speaker needs a cable back to where its amplifier lives, and in-ceiling and in-wall speakers need that cable in place before the ceiling or wall closes.
- Multi-room audio: decide which rooms get music, and mark the in-ceiling or in-wall speaker points in each of those rooms.
- Decide where the amplifiers or streamers live. We usually put them in the central rack (see section 7).
- Run speaker cable from every speaker point in every room back to the rack in one piece, and label both ends with the room and position.
- If you want a volume keypad or control point in a room, mark its position now and run a cable to it.
- Home theater: speakers must be wired to suit the system you choose, for example 5.1, 7.1, or 5.1.2 with height speakers. We plan the speaker layout with you at the design stage, from your screen wall and seating position.
- Projector and screen: mark their positions at the design stage too, so power and cable can reach them before the false ceiling closes.
Planning the theatre? The Home Theatre Suggester suggests a speaker layout for your room, and the Projector Selector shows the screen size and projector position, so you can mark them before the ceiling closes.
5. CCTV and video door phone points
Camera and door-phone positions are easy to agree on a drawing and hard to move after plastering.
- Mark every camera point: gate, main door, parking, perimeter, and back or service doors.
- Agree every camera position and angle at the design stage, on the drawing, before any conduit is laid.
- Cat6 from every camera to the recorder position at the central rack.
- Video door phone: mark the outdoor unit at the gate and/or the main door, and every indoor monitor position.
- Run Cat6 from the outdoor unit and from each indoor monitor back to the rack. We use IP-based video door phones, so Cat6 is the cable.
- Place each indoor monitor at a comfortable viewing height, agreed at the design stage.
- If you plan a wired intrusion alarm, mark the sensor and siren points now as well.
6. Power points for motorised curtains and the gate
A motorised curtain needs power at the top of the window, usually hidden in the pelmet or false ceiling. It is an easy one to miss.
- A power point at the top of every window that will get a motorised curtain or blind, inside the pelmet or false ceiling.
- The curtain power point can go at either end of the track. Place it so it is hidden once the curtain fabric is installed.
- Gate motor: run a dedicated power supply, with an earth, from the distribution board to the gate pillar, in its own conduit. The cable size depends on the motor type (230 V AC or 24 V DC) and the length of the run, so we confirm it with the gate supplier before the conduit is laid.
- Run a spare conduit to the gate for the door phone outdoor unit, a camera, and any future additions.
7. A central rack location
Every cable in a smart home ends up somewhere. Decide where before the first conduit is laid, so every run heads to the same place.
- Choose one location for the rack: dry, ventilated, and easy to reach for service.
- Bring every Cat6 run, camera cable, speaker cable and the internet connection to this point.
- Route the internet provider’s incoming fibre or cable from its entry point to the rack.
- Power at the rack: one socket is enough. A small UPS plugs in there and powers everything in the rack.
- Rack size: we size the rack for you during design, based on what goes in it.
- If you choose KNX, plan the distribution board with the rack in mind, since KNX equipment sits in the board (see the next section).
8. KNX or Zigbee/Wi-Fi: decide before plastering
This is the decision that changes the electrical layout itself, which is why it cannot wait until after plastering.
- KNX is wired. A bus cable runs to every keypad and sensor, and the switching equipment sits in the distribution board. That changes how circuits are wired back to the board and how big the board has to be.
- Distribution board space for KNX: we plan the board space with you during design.
- Zigbee and Wi-Fi systems are wireless. Modules sit behind the switches and work with conventional wiring. They fit a normal standard gang box, and most still need a neutral at the switch.
- If you are unsure, wire so KNX stays possible. Adding a wired system after plastering means breaking walls.
- Decide with your architect and us before the electrician starts chasing walls. We compare both for your home at the design visit.
Questions we get about pre-wiring
- When should smart home wiring be planned in a new build?
- Before plastering and before the false ceiling closes, once the floor plan and furniture layout are fixed. After that, every missed wire means breaking walls or running surface conduit.
- Do smart switches need a neutral wire?
- Most smart switches need a neutral at the switch box to power themselves, and Stoic switches need one at every switch box. That is why we ask for a neutral at every switch point, including two-way and staircase switches, before plastering.
- Why do I have to choose between KNX and Zigbee/Wi-Fi before plastering?
- KNX is wired: a bus cable runs to every keypad and sensor, and the switching equipment sits in the distribution board, so it changes how the house is wired. Zigbee and Wi-Fi work with conventional wiring. Adding a wired system after plastering means breaking walls.
- What wiring do multi-room audio and home theater speakers need before plastering?
- Mark every in-ceiling or in-wall speaker point, decide where the amplifiers or streamers live (usually the central rack), and run speaker cable from each point back there. For a home theater, the speakers must be wired to suit the system you choose, such as 5.1, 7.1 or 5.1.2, and we plan that layout with you at the design stage.
- What power points do motorised curtains need?
- A power point at the top of each window that will get a motorised curtain or blind, usually in the pelmet or false ceiling. Either end of the track is fine. Place it so it is hidden once the curtain fabric is installed.
- What does the Homezee design visit cost?
- The design and site visit for automation or home theater is ₹3,000, and it is adjusted against the final invoice. Every system we install comes with a 1-year full-system warranty, serviced by our own team.
Book a design visit before you plaster
We come to site, look at your drawings with you and your architect, and design the whole system before a single wire goes in. The design visit for automation or home theater is ₹3,000, adjusted against the final invoice. Every system we install has a 1-year full-system warranty, serviced by our own team.
Book the ₹3,000 design visit on WhatsApp
WhatsApp +91 80884 40322 · Printable PDF · How we work · More guides